Showing posts with label gift tags. Show all posts

Thursday, October 6, 2011

DIY, Your Own Way

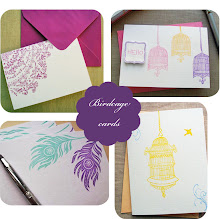
Why should you buy everything already made in someone else's vision? Why not have a little fun and make it yourself? As a paper crafter and artist I sometimes take for granted that not everyone has the means - or quite frankly, the time - to make their mailing tags by hand, but that doesn't mean that they don't want to embellish and decorate a set of those tags 'til their hearts content.

So, with that thought in mind I lovingly handcrafted and pieced together some basic kits for the shop. I like to think of them as a do-it-yourself for paper enthusiasts. Use each kit to decorate gifts and enclosure cards oh so stylishly, write fun little lunchbox notes, make quirky to-do-lists, embellish journals and scrapbooks...whatever you create just be sure to have fun with it and, most importantly, let your creativity guide you.

Until next time, be sure to share your love.
- Kate

Friday, December 11, 2009

Wrap It Up...

It's been all snowy and blistery this week making it hard to get out and pick up the rest of my Christmas necessities. So, I've been focusing on all the little things I can do to be prepared for the big week while snugly tucked away inside: like making chocolate covered pretzels to go in those cute holiday gift tins - that is they will go in the gift tins when I get a chance to pick some up; pulling out all the decorations and twinkling lights that I could find to make my house bright enough to direct airline traffic; re-assembling the wreath I made last year after I found it smashed and crammed and all out of shape stuffed into a dark corner in the back of my attic - I swear I put it away last year with lots of love and care...really I swear! And, hands down, my favorite part of buying holiday gifts - wrapping them. I know a lot of people look to gift wrapping as a dreaded chore, but not me. Afterall, I do love a pretty bow.

So, today I've gathered a few of my favorite wrapping techniques to share with you. Hopefully, it will help generate some ideas of your own. Because, afterall, wrapping a gift in a proper box with holiday paper and a bow shows you spent time on it, put care into it, and the person lucky enough to open either that small secret Santa gift or a luxurious cashmere cardigan will feel quite loved and special...and isn't that what it's all about?

1. If you're getting a gift from me this year (or any year for that) chances are it's going to look like this. There is just something warm and familiar to me about gifts wrapped in kraft paper, topped with organic decorations like pine cones and branches and a little woodland inspired gift tag.
2. peony bow: A bow shaped like my favorite flower?! Seriously, do I even need to share anymore? And if the bow proves way too tricky for your little fingers then use some double sided tape and a real flower like shown here.
3. I've been dying to take a go at these fabric envelopes, but my sewing machine is on the fritz and really who has the time to hand stitch anything these days?
4. Love love this idea from Real Simple! Use your printer to decorate your own gift wrap with a special holiday message. Just be sure to wrap the paper on a bias to give it that fun look. Or try this adorable calendar wrap idea, shown above, that's along the same line.
5. Not good at tying bows? Grab some fat ribbon and knot it. It will look just as pretty and no one will be the wiser.
6. bowtie pasta bow: Wrapping a gift for the cook in the family? Add a little whimsy and grab some bowtie pasta and plain string from the kitchen cabinets and decorate away.
7. shopping bags re-purposed: Feel like being eco-friendly? Use your old plastic bags to wrap a present in a fresh way.
8. Use this tutorial and try your hand at making your own wrapping paper. Trust me its easier than you think.

Most importantly, just remember to have fun with it. Giving a gift can be so much more fun than receiving one.

wishing you all a warm and cozy weekend,
-Kate

Saturday, October 10, 2009

Mixed Doily Minis

One of the best parts about being a stationery designer is that when you need something that can't easily be found you can just make it! So that's exactly what I did.
I took my favorite muted colors and my favorite current concept (paper doilies) and whipped up some small 2 3/4" x 2 3/4" folded note cards. I love mini note cards because they truly are the most versatile kind of stationery. You can slip the card in its envelope and tuck it inside a present as a lovely gift enclosure. You can punch a hole in one of the top corners, thread some ribbon through, and hang it from a bottle of wine as a gift tag. Or you can write a secret message inside and tuck it under a pillow, into a briefcase, or on top of a box of sweets! They're just so darned useful.

I send cards all the time through the mail when I can't be there to say something meaningful in person or when I need to tuck some cash inside in lieu of a gift. But, I mean think about it, when you're right there presenting the gift in person do you really need a $4.00 card to write three little lines in? Nope. All you need is a tiny little gift card where you can write "Happy Birthday" or "Congratulations! Love you tons" inside and be done with it. Honestly, it's my idea of the perfect arrangement.

And because these little guys are such a big hit every time I use them, because I know just how hard it is to find them, and because I know how useful they really are I decided to offer these Paper Doily Mini Note Cards paired with 6 very soft muted orange colored envelopes (not nearly as dark and vivid as shown in the pictures) in my shop. While you're there feel take some time to browse through and see what else is new. I've been quite the busy bee and I'm not even close to being done for the season!