With the holidays fast approaching if you're anything like me you're always on the look out for inexpensive and easy to make stocking stuffer ideas. Well here is a great little D.I.Y. that takes next to no time to whip up, is super easy to personalize (say with an initial stamp), and costs literally pennies per item to make. Ready for it? That's right - matchbook notepads, but this version is large enough to actually be useful and jot down lists and ideas in. Plus, it's complete with hidden staples which makes it both kid friendly and purse friendly - no pesky exposed staples snagging on fingers or fabric.
All right, let's get down to it. Here's what you'll need:
 1.
1. a strip of card stock which will serve as the notepad's cover measuring 2 3/4" x 11"
2. two sheets of basic copy paper for the inserts
3. a paper cutter for cutting your paper
and to serve as your ruler
4. a heavy duty craft glue {Crafter's Pick works great and can be found at your local Michael's craft store.}
5. a stapler with at least 2 staples
6. two paperclips (optional)
7. a small perforated rotary cutter {You can also pick up a small handheld one at your local Michael's for $1.99 or just use your sewing machine minus the thread}
8. a bone folder to help make neat folds and crease lines (optional)
How To:
 1.
1. Cut your copy paper into strips measuring 2 1/5" wide by 11" long. You will get 3 strips per sheet.
2. Now take those strips and cut them down to 2 1/5" x 3 1/2" pieces. You will get 3 per strip. Count out 12 sheets of paper to go inside your notepad and put the rest aside for any other notepads you may want to make later.
3. Use your perforated rotary blade or an unthreaded sewing machine and perforate the copy paper 1/2" from the bottom and set aside.
4. Grab your strip of card stock and lay it face up. Fold inward a 1" flap at one end.
5. Flip your card stock over, face down, and fold a 1" flap after the first fold.
6. Keeping your card stock face down make a third 1" fold after the first two.
7. Keep all the folds sandwiched down together and measure 4" from the top of the folds towards the center of your card stock. Make a crease to be folded down as the cover later.
8. Now that your card stock is all folded take your sheets of copy paper and insert the perforated ends into the pocket created by first fold. Center the paper from the sides of the card stock getting ready to staple at each end. You can use your paperclips to help keep the sheets of paper together and to keep them in the right spot...
9. ...because you will need to turn your card stock over to staple it. Make sure you place those staples below the perforated lines. This way the paper can be easily ton out of the notepad.
10. Get out your craft glue and add some paste between the second and third folds and smoosh the two together.
11. With those pieces glued together now apply some glue to the other side, being mindful not to get any on the copy paper, and fold inward making a sandwich.
12. Now fold the 4" crease down over the copy paper making a cover. Trim any excess card stock off so that the cover will tuck comfortably into the bottom lip like a standard matchbook.

Now that your notepad is complete grab those stamps, linocuts, paper punches and have fun decorating! Don't be afraid to put some personality into those stocking stuffers.


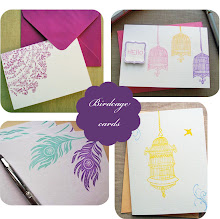
 It's been a busy month for both me and Birdcage Cards and its only half-way through. *breathe*

 {For links to any of the items shown above just click the picture. It will take you to my treasury on Etsy. Happy shopping!}

 Posts
Posts